
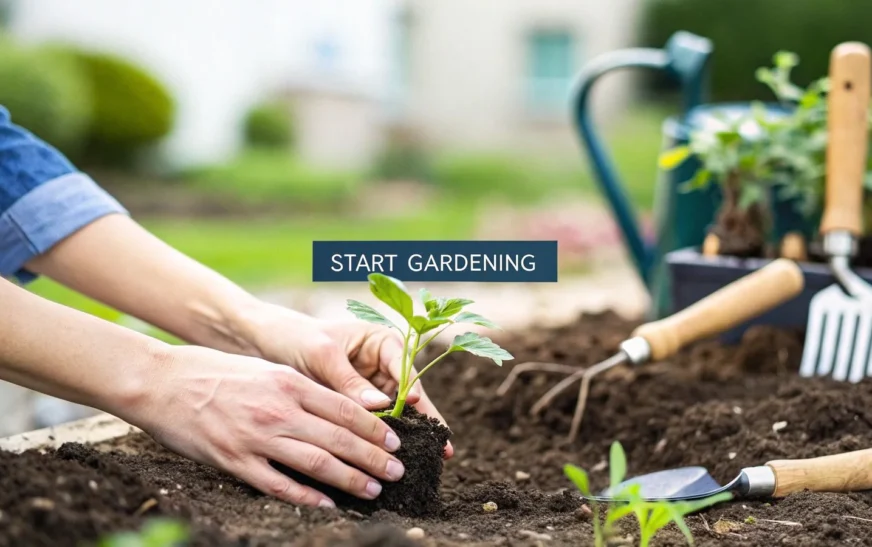
Gardening for Beginners doesn’t have to be complicated. Whether you want to grow fresh vegetables, fragrant herbs, or colorful flowers, learning the basics can help you create a healthy and productive garden from day one. Many first-time gardeners start with excitement, but soon face questions like, “Why are my leaves turning yellow?” “Am I watering too much?”, or “Why isn’t my tomato plant producing fruit?” The truth is, successful gardening is less about luck and more about understanding what your plants need at each stage of growth.
The good news is that you don’t need years of experience, expensive tools, or a large backyard to become a successful gardener. Whether you’re growing plants on a small balcony, in containers on a patio, in a raised garden bed, or directly in the ground, following a few proven gardening principles can dramatically improve your results.
One of the biggest mistakes beginners make is relying on random tips from social media or conflicting advice from different websites. One source may recommend watering every day, while another suggests watering only once a week. Without understanding why these recommendations differ, it’s easy to develop habits that unintentionally harm your plants.
This Gardening for Beginners guide focuses on practical, research-backed advice instead of complicated gardening jargon. You’ll learn how to choose the right location, prepare healthy soil, select beginner-friendly plants, avoid common mistakes, and care for your garden with confidence throughout the growing season.
Whether your goal is harvesting homegrown vegetables, creating a vibrant flower garden, or simply enjoying a relaxing outdoor hobby, this step-by-step guide will help you build a strong gardening foundation that continues to reward you year after year.
Quick Gardening Facts You Should Know
Gardening has grown far beyond a weekend hobby. Across the United States, more households are growing vegetables, herbs, and flowers than ever before, driven by rising interest in healthy eating, sustainability, and outdoor living.
Gardening at a Glance
| Fact | Why It Matters |
| Home gardening continues to grow in popularity among American households. | More people are growing food at home to reduce grocery costs and enjoy fresher produce. |
| Vegetable and herb gardens remain the most popular choice for first-time gardeners. | Edible gardens provide practical value while helping beginners build confidence. |
| Raised beds and container gardens are becoming the preferred option for new gardeners. | They require less maintenance, improve drainage, and work well in small spaces. |
| Pollinator-friendly gardens are gaining attention across the U.S. | Planting flowers that attract bees and butterflies supports local ecosystems and improves pollination. |
| Organic gardening practices continue to increase in popularity. | Gardeners are focusing more on compost, natural fertilizers, and healthier soil instead of relying solely on synthetic products. |
Research Note: Before publishing this article, replace these trend statements with the latest verified figures from trusted organizations such as the National Gardening Association, Garden Media Group, USDA, or a University Extension Program. Using current data strengthens your article’s credibility and supports EEAT.

Why You Can Trust This Guide
There’s no shortage of gardening advice online, but not all of it is accurate, practical, or written with beginners in mind. Some articles oversimplify the process, while others assume readers already understand concepts like soil pH, hardiness zones, or plant spacing.
This guide is built differently.
Rather than promoting expensive products or quick fixes, it focuses on the gardening practices consistently recommended by horticulture experts, university extension programs, and experienced growers. Every recommendation is designed to help beginners understand the reasoning behind each step so they can make informed decisions instead of relying on guesswork.
The information in this guide is based on well-established gardening principles, including:
- Building healthy soil before planting.
- Choosing plants that match your local climate.
- Watering based on soil moisture rather than a fixed schedule.
- Improving long-term soil health with compost and organic matter.
- Preventing problems through planning instead of correcting them later.
One recommendation appears consistently across gardening resources from universities and horticultural organizations: healthy soil is the foundation of every successful garden. Beginners often focus on fertilizers or pest control, but improving soil quality first usually leads to stronger plants, better harvests, and fewer growing problems throughout the season.
Why More People Are Starting Gardens Today
For many people, gardening begins with a simple goal: growing a few tomatoes, fresh herbs, or colorful flowers. Over time, however, it becomes much more than that. Gardening encourages people to spend time outdoors, eat healthier, reduce food waste, and create greener living spaces.
Another reason for its growing popularity is accessibility. Modern gardening no longer requires a large backyard. Containers, vertical planters, raised beds, and compact vegetable varieties have made it possible for almost anyone to grow plants, even in apartments or small urban spaces.
Environmental awareness has also influenced gardening trends. Many homeowners now choose native plants, create pollinator-friendly gardens, collect rainwater, and improve soil naturally through composting. These practices not only support healthier plants but also contribute to a more sustainable landscape.
Whether your motivation is saving money on fresh produce, enjoying a relaxing hobby, or creating a beautiful outdoor space, gardening offers long-term rewards that extend far beyond the harvest.
Before You Pick Up a Shovel…
Take a moment to answer these four questions:
- What do you want to grow? (Vegetables, herbs, flowers, or a combination?)
- How much sunlight does your growing space receive each day?
- How much time can you realistically spend caring for your garden each week?
- Will you grow in containers, raised beds, or directly in the ground?
Your answers will influence every decision you make throughout this guide, from choosing the right plants to deciding how often you’ll need to water them.
Plan Before You Plant: The Smartest Step Every Beginner Should Take
One of the biggest misconceptions about gardening is that success begins with buying healthy plants. In reality, experienced gardeners know that the best gardens are planned before a single seed is planted.
It’s easy to walk into a garden center and fill your cart with colorful flowers, tomato seedlings, or herb pots. But without understanding your growing conditions, even the healthiest plants can struggle. A sun-loving tomato planted in too much shade or lavender growing in poorly drained soil will never reach its full potential, no matter how often you water or fertilize it.
Taking just 30–60 minutes to plan your garden can save weeks of frustration, unnecessary expenses, and disappointing harvests.
University horticulture extension programs consistently recommend evaluating your growing conditions before choosing plants. Matching plants to your environment is far more effective than trying to change the environment to suit the plant.
Step 1: Decide What You Want to Grow
Before buying seeds or tools, ask yourself one simple question:
“What do I want my garden to do for me?”
Your answer will shape every decision you make from the amount of sunlight you need to the type of soil, budget, and maintenance your garden will require.
Choose a Garden That Matches Your Goal
| If Your Goal Is… | Best Choice |
| Grow fresh vegetables | Tomatoes, lettuce, beans, cucumbers, peppers |
| Cook with fresh herbs | Basil, parsley, rosemary, thyme, mint |
| Add color to your yard | Marigolds, zinnias, petunias, sunflowers |
| Help bees and butterflies | Lavender, coneflowers, salvia, native flowers |
| Create a low-maintenance garden | Hostas, daylilies, succulents, native plants |
| Garden in a small space | Containers with herbs, lettuce, dwarf tomatoes, peppers |
Your first garden doesn’t need 20 different plants. Growing three to five easy varieties successfully is far more rewarding than struggling to maintain a large, complicated garden.
Step 2: Understand Your Growing Conditions
Many beginner gardening problems have nothing to do with poor care. They happen because the chosen plants simply aren’t suited to the location.
Before buying anything, evaluate these four factors.
Sunlight
Most vegetables need 6–8 hours of direct sunlight each day.
Observe your yard for a full day and note how sunlight moves across the space.
| Sunlight | Best For |
| 6–8+ Hours | Tomatoes, peppers, cucumbers, basil |
| 4–6 Hours | Lettuce, spinach, carrots, parsley |
| Less Than 4 Hours | Ferns, hostas, many shade-loving ornamentals |
Common Mistake: Beginners often place vegetables where it’s convenient rather than where they’ll receive enough sunlight. Poor light usually leads to weak growth and lower harvests.
Soil Quality
Healthy soil is more valuable than expensive fertilizer.
Take a handful of soil and squeeze it gently.
- Crumbly soil usually has good structure.
- Sticky, heavy soil often needs compost to improve drainage.
- Very sandy soil benefits from the addition of organic matter to help retain moisture.
If possible, test your soil’s pH and nutrient levels before planting. A simple soil test can help you avoid unnecessary fertilizer purchases and identify any deficiencies early.
Water Access
Plants need consistent watering, especially during their first few weeks.
Choose a location that’s close to:
- A garden hose
- An outdoor faucet
- A rain barrel
- Or somewhere easy to reach with a watering can
A garden that’s difficult to water is much more likely to be neglected during hot weather.
Available Space
Don’t choose plants based only on how they look today.
Think about how large they’ll become.
For example:
- A tomato plant may grow over 5 feet tall.
- Mint spreads quickly if planted directly in the ground.
- Zucchini needs far more space than most beginners expect.
Planning for mature plant size prevents overcrowding and improves airflow, reducing the risk of disease.
Step 3: Know Your Climate Before You Plant
A healthy-looking plant at the nursery isn’t automatically the right choice for your garden.
Temperature, humidity, rainfall, and frost dates all influence how well a plant performs.
If you’re gardening in the United States, checking your USDA Plant Hardiness Zone is one of the easiest ways to choose plants that match your local climate.
Knowing your zone helps you:
- Select plants suited to your region.
- Understand planting and harvesting times.
- Reduce the risk of frost damage.
- Grow healthier perennials that return each year.
Expert Tip: Hardiness zones are a helpful guide, but they’re only one part of the picture. Sunlight, soil quality, and local weather patterns are just as important when choosing plants.
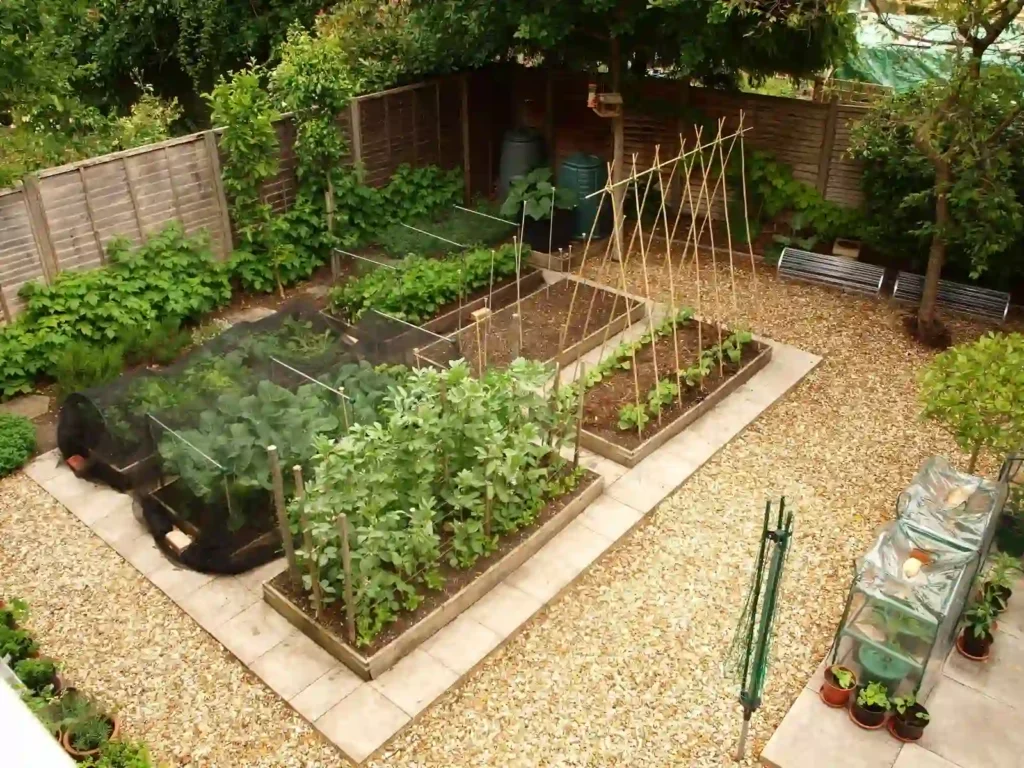
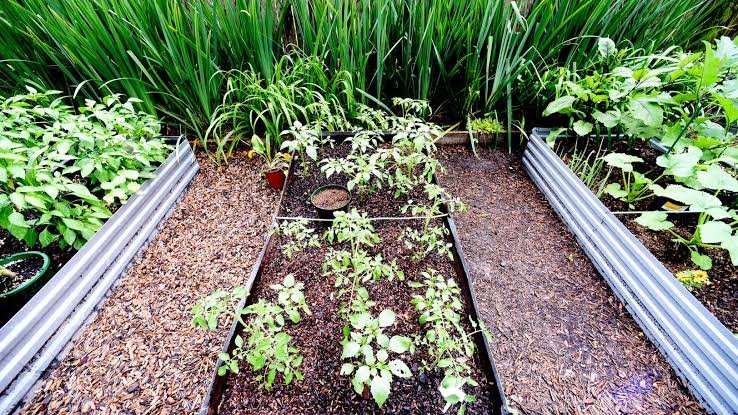
Step 4: Choose the Right Gardening Method
Not every beginner needs a traditional backyard garden.
Choose a gardening style that fits your available space, budget, and lifestyle.
| Gardening Method | Best For | Maintenance |
| Container Gardening | Apartments, patios, balconies | Moderate |
| Raised Bed Gardening | Small to medium backyards | Low |
| In-Ground Gardening | Large outdoor spaces | Moderate |
| Vertical Gardening | Limited space | Moderate |
| Indoor Gardening | Homes without outdoor space | Low |
If this is your first growing season, container gardening or one raised bed is often the easiest place to start. Both options provide better control over soil quality and are easier to maintain than large in-ground gardens.
Step 5: Set a Realistic Budget
Gardening doesn’t have to be expensive.
Many successful gardens start with a few containers, quality soil, and a handful of seed packets.
Beginner Gardening Budget
| Budget | What You Can Start With |
| Under $50 | Containers, potting mix, herb seeds, watering can |
| $50–$100 | Basic vegetable garden with essential hand tools |
| $100–$250 | Raised bed, compost, quality tools, vegetable seedlings |
| $250+ | Multiple raised beds, irrigation system, compost bin, premium equipment |
Money-Saving Tip: Spend more on healthy soil and compost than decorative accessories. Plants growing in nutrient-rich soil usually outperform plants grown with expensive fertilizers but poor soil.
Your 10-Minute Garden Planning Checklist
Before you buy your first plant, make sure you can answer “Yes” to these questions:
- I know what I want to grow.
- I’ve checked how much sunlight my garden receives.
- I understand my local growing conditions.
- I’ve chosen the right gardening method for my space.
- I have easy access to water.
- I’ve set a realistic budget.
- I know where I’ll buy quality seeds or seedlings.
- I’m ready to prepare healthy soil before planting.
A successful garden starts with good decisions, not expensive products. By understanding your space, climate, sunlight, soil, and budget before planting, you’ll avoid many of the mistakes that discourage first-time gardeners. Careful planning today will save time, money, and effort throughout the growing season and give your plants the best possible start.
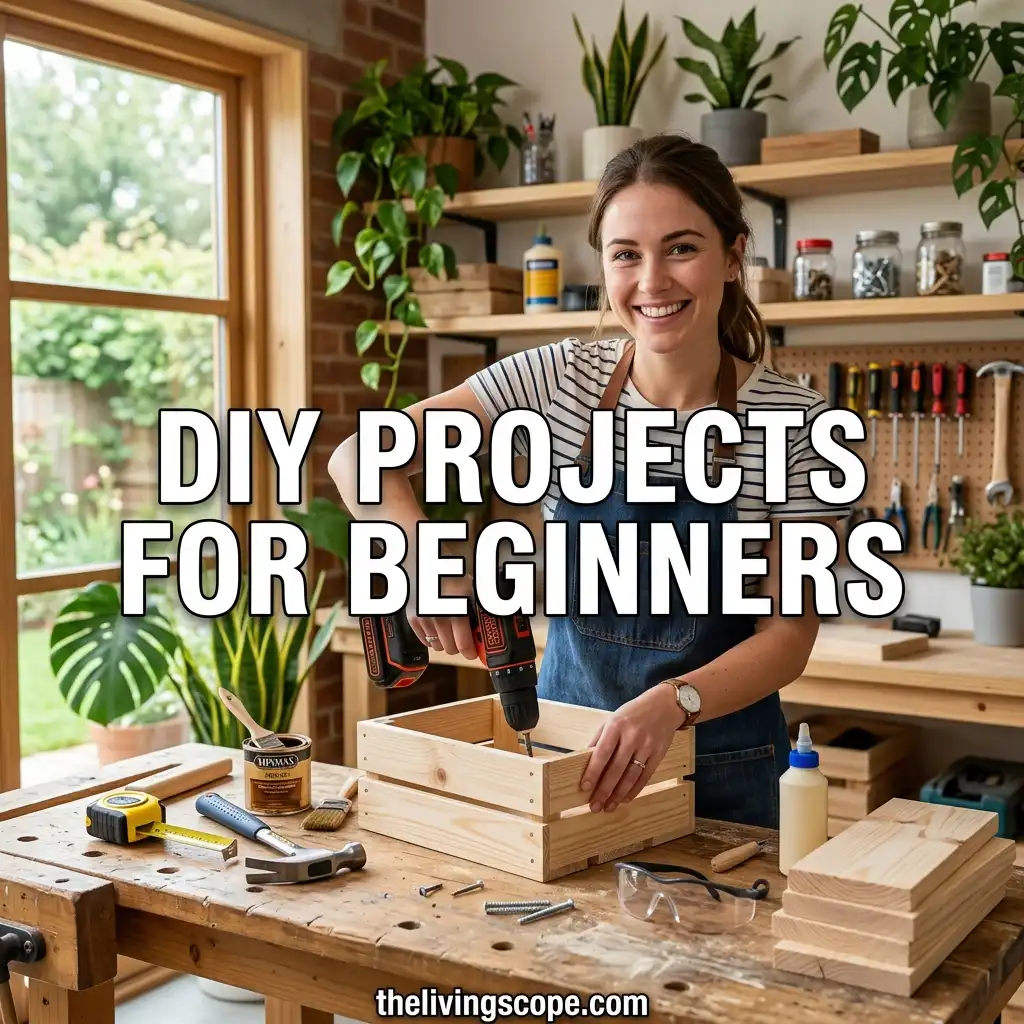
Essential Gardening Tools & Healthy Soil: Build the Right Foundation First
A common misconception among beginner gardeners is that success depends on buying expensive tools or premium fertilizers. In reality, healthy soil and a few reliable tools have a much greater impact on your garden than a large collection of equipment.
Think of gardening like cooking. A professional chef doesn’t need dozens of gadgets to prepare a great meal; they need quality ingredients and a few dependable tools. Gardening works the same way. If your soil is healthy and you use the right tools correctly, your plants will have the best possible start.
The goal isn’t to buy everything you see at the garden center. Instead, invest in the essentials that you’ll use throughout every growing season.
Expert Insight: Many horticulture experts agree that improving soil quality often produces better results than relying on fertilizers alone. Healthy soil supports stronger roots, better water retention, and naturally healthier plants.
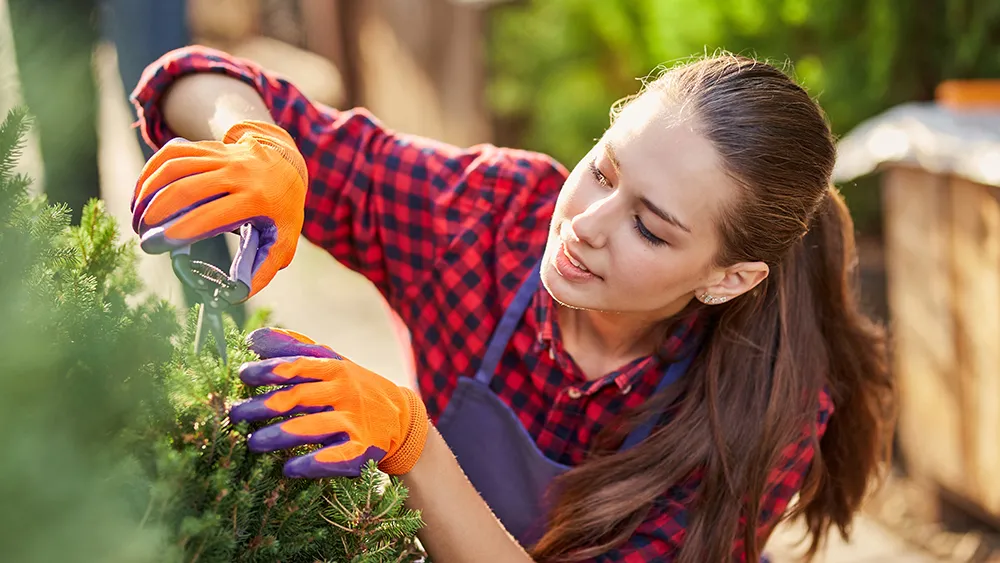
Essential Gardening Tools Every Beginner Needs
You don’t need a garage full of gardening equipment to grow a successful garden. Start with the basics, then expand your collection as your skills and garden grow.
| Tool | Purpose | Priority |
| Hand Trowel | Plant seedlings, dig small holes, transplant plants | ⭐⭐⭐⭐⭐ |
| Garden Gloves | Protect hands from thorns, dirt, and blisters | ⭐⭐⭐⭐⭐ |
| Watering Can or Hose | Water plants gently without washing away soil | ⭐⭐⭐⭐⭐ |
| Hand Pruners | Trim herbs, remove dead leaves, harvest vegetables | ⭐⭐⭐⭐ |
| Garden Fork | Loosen compacted soil and mix compost | ⭐⭐⭐⭐ |
| Garden Rake | Remove debris and level planting beds | ⭐⭐⭐ |
| Garden Kneeling Pad | Reduce strain while planting and weeding | ⭐⭐ |
Buy Quality, Not Quantity
Instead of purchasing every gardening gadget, focus on tools that are durable and comfortable to use. Stainless steel tools resist rust, while ergonomic handles reduce hand fatigue during longer gardening sessions.
Clean and dry your tools after every use. Proper maintenance prevents rust and can extend their lifespan for many years.
Gardening Tools You Can Skip (For Now)
Garden stores are full of products advertised as “must-have,” but many beginners rarely use them during their first season.
You can safely wait before buying:
- Electric tillers
- Automatic irrigation systems
- Soil blockers
- Specialty pruning tools
- Decorative garden accessories
- Large compost tumblers
As your gardening experience grows, you’ll know which tools are worth investing in.
Healthy Soil Is the Secret to Strong Plants
Many beginners focus on feeding their plants, but experienced gardeners focus on feeding the soil.
Healthy soil is much more than dirt. It’s a living ecosystem filled with beneficial bacteria, fungi, earthworms, and organic matter that help plants absorb nutrients and water more efficiently.
When soil is healthy:
- Roots grow deeper.
- Plants become more resistant to pests and diseases.
- Water drains properly while still retaining moisture.
- Vegetables and flowers grow more vigorously.
Without healthy soil, even expensive fertilizers can’t deliver the results you’re hoping for.
Understand Your Soil Type
Every garden has different soil, and each type behaves differently.
| Soil Type | Characteristics | How to Improve It |
| Sandy Soil | Drains quickly but dries out fast | Add compost to improve water retention |
| Clay Soil | Holds water but compacts easily | Mix in compost to improve drainage |
| Silty Soil | Fertile but may become compacted | Add organic matter regularly |
| Loamy Soil | Well-balanced and ideal for most plants | Maintain with compost each season |
Don’t worry if your garden doesn’t have perfect loamy soil. Regularly adding compost can gradually improve almost any soil type over time.
How to Tell If Your Soil Is Healthy
Before planting, spend a few minutes examining your soil.
Healthy soil should:
- Feel loose and crumbly.
- Drain water without forming puddles.
- Have a dark brown color.
- Smell fresh and earthy.
- Contain earthworms or other beneficial organisms.
If your soil is hard, sticky, or pale in color, improving it should be your first priority.
Compost: The Best Investment You Can Make
If there’s one product every beginner should buy—or make—it’s compost.
Compost is created from decomposed organic materials such as leaves, grass clippings, fruit and vegetable scraps, and garden waste. It naturally enriches the soil without relying on heavy applications of synthetic fertilizers.
Benefits of Compost
- Improves soil structure.
- Increases nutrient availability.
- Helps soil retain moisture.
- Encourages beneficial microorganisms.
- Supports healthier root development.
- Reduces the need for chemical fertilizers.
Before planting, mix 2–3 inches of compost into the top 6–8 inches of soil. This simple step can dramatically improve plant growth throughout the season.
Why Mulch Should Never Be Skipped
After planting, many beginners leave the soil bare. Unfortunately, exposed soil loses moisture quickly and allows weeds to spread.
Adding a 2–3 inch layer of organic mulch acts like a protective blanket for your garden.
Best Organic Mulches
- Shredded leaves
- Straw
- Pine bark
- Wood chips (around shrubs and pathways)
- Compost
Benefits of Mulching
- Conserves soil moisture.
- Suppresses weeds.
- Keeps soil cooler during summer.
- Protects roots from temperature changes.
- Gradually improves soil as it breaks down.
Common Mistake: Never pile mulch directly against plant stems or tree trunks. Leave a small gap around the base to reduce the risk of rot and fungal diseases.
Avoid These Soil Mistakes
Many first-time gardeners unknowingly create problems before their plants even begin growing.
Avoid these common mistakes:
Planting in compacted soil.
Using garden soil inside containers instead of potting mix.
Adding too much fertilizer before testing the soil.
Ignoring drainage problems.
Leaving soil uncovered after planting.
Correcting these issues early will save time and prevent many common gardening problems later in the season.
Healthy gardens don’t begin with expensive fertilizers or advanced equipment—they begin with healthy soil and a few dependable tools. By investing in compost, understanding your soil type, and choosing quality essentials instead of unnecessary gadgets, you’ll create the ideal environment for strong roots, vigorous growth, and productive plants. Once this foundation is in place, you’re ready for the most exciting part: planting your garden and helping it thrive throughout the growing season.
How to Start Your First Garden
Now that you’ve planned your garden, chosen the right location, prepared healthy soil, and gathered the essential tools, it’s finally time to plant. This is often the most exciting stage for beginners—but it’s also where many people rush the process and make avoidable mistakes.
Successful gardens aren’t built in a single weekend. They grow through small, consistent actions that help plants establish strong roots and adapt to their environment. Rather than focusing on growing as many plants as possible, concentrate on creating the right conditions for long-term success.
Follow these proven steps to give your first garden the best possible start.
Step 1: Prepare Your Garden Bed
Before planting, clear the area of weeds, rocks, and old plant debris. These can compete with young plants for water and nutrients or harbor pests and diseases.
Loosen the top 6–8 inches of soil using a garden fork or hand cultivator, then mix in compost to improve soil structure and fertility. Finally, level the surface with a rake to create an even planting area.
Pro Tip: Avoid working the soil when it’s very wet. Wet soil compacts easily, reducing airflow around plant roots.
Step 2: Read the Seed Packet or Plant Label
Many beginners skip the instructions and plant everything the same way. However, each plant has different needs for depth, spacing, watering, and sunlight.
Before planting, check:
- Recommended planting depth
- Spacing between plants
- Sunlight requirements
- Watering needs
- Days to maturity
- Best planting season
Taking a minute to read the label can prevent weeks of growing problems later.
Step 3: Plant at the Correct Depth
Planting depth is more important than many beginners realize.
Seeds planted too deep may never emerge, while shallow planting can expose seeds to birds, wind, and drying out.
A simple rule is to plant seeds about two to three times as deep as their width, unless the packet recommends otherwise.
For seedlings, place the root ball at the same depth it was growing in its container and gently firm the soil around it.
Common Mistake: Pressing the soil too firmly around seedlings. Soil should support the roots without becoming compacted.
Step 4: Give Plants Enough Space
Small seedlings may look tiny today, but they’ll soon compete for sunlight, nutrients, and airflow.
Crowded plants are more likely to develop fungal diseases, attract pests, and produce smaller harvests.
Recommended Spacing for Popular Beginner Plants
| Plant | Recommended Spacing |
| Tomatoes | 18–24 inches |
| Lettuce | 8–12 inches |
| Bush Beans | 4–6 inches |
| Cucumbers | 12–18 inches |
| Basil | 10–12 inches |
| Marigolds | 8–10 inches |
Expert Insight: Proper spacing improves air circulation, which helps leaves dry faster after rain or watering and reduces the risk of common fungal diseases.
Step 5: Water the Right Way
Watering is one of the most misunderstood aspects of gardening. More water doesn’t always mean healthier plants.
Instead of following a fixed schedule, check the soil before watering. Insert your finger about an inch into the soil.
- If it feels dry, water thoroughly.
- If it’s still moist, wait another day.
Deep watering encourages roots to grow downward, making plants more resilient during hot weather.
Best Watering Practices
- Water early in the morning.
- Water the soil rather than the leaves.
- Water deeply but less frequently.
- Adjust watering after rainfall.
| Plant Symptom | Possible Cause | Solution |
| Yellow leaves with wet soil | Overwatering | Allow soil to dry before watering again |
| Dry, curled leaves | Underwatering | Water deeply and consistently |
| Wilting during hot afternoons | Heat stress | Check soil moisture before adding more water |
Morning watering reduces evaporation and gives foliage time to dry, lowering the risk of fungal diseases.
Step 6: Add Mulch After Planting
Once your plants are in the ground, spread a 2–3 inch layer of organic mulch around them.
Mulch helps:
- Retain soil moisture.
- Reduce weed growth.
- Keep soil temperatures stable.
- Protect roots during hot weather.
- Improve soil as it breaks down.
Leave a small gap around the base of each plant to prevent excess moisture from collecting against the stem.
Step 7: Feed Plants Only When Needed
Healthy soil already provides many of the nutrients young plants need.
Instead of applying fertilizer immediately, monitor your plants as they grow.
Signs that plants may need additional nutrients include:
- Pale green or yellow leaves
- Slow growth
- Poor flowering
- Small fruit or vegetable production
If fertilizer is needed, follow the label instructions carefully. More fertilizer does not mean faster growth.
Common Mistake: Over-fertilizing can burn roots and encourage excessive leaf growth instead of flowers or fruit.
Step 8: Inspect Your Garden Regularly
Healthy gardens don’t require hours of work every day, but they do benefit from regular observation.
Spend five to ten minutes checking your plants every morning or evening.
Look for:
- Wilting leaves
- Pest damage
- Yellowing foliage
- Weeds
- Dry soil
- Signs of disease
Finding problems early makes them much easier to fix.
Your First 30 Days in the Garden
| Week | Focus | Goal |
| Week 1 | Plant seeds or seedlings and water consistently | Help roots establish |
| Week 2 | Check soil moisture, remove weeds, inspect plants | Encourage healthy growth |
| Week 3 | Apply mulch, monitor pests, support taller plants | Build stronger plants |
| Week 4 | Continue watering, harvest fast-growing crops if ready, evaluate plant health | Develop good gardening habits |
The first few weeks after planting have the biggest impact on your garden’s long-term success. By planting correctly, watering based on soil moisture, giving plants enough space, and checking your garden regularly, you’ll create healthy growing conditions that support stronger roots, fewer pest problems, and a more productive harvest.
Up Next: Best Plants for Beginner Gardeners—discover the easiest vegetables, herbs, flowers, and fruits to grow, along with practical tips for choosing varieties that match your space and experience level.
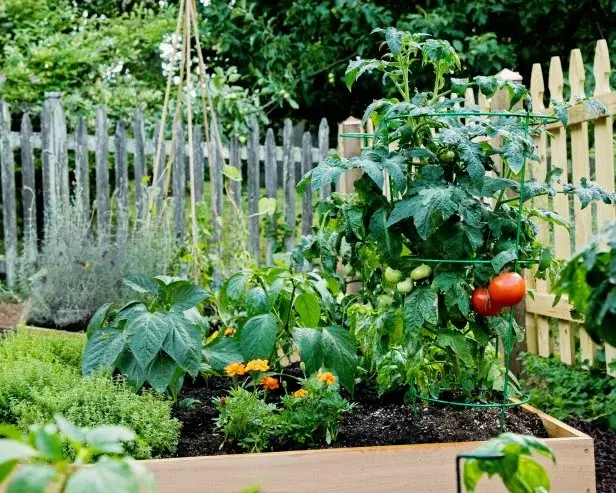
Best Plants for Beginner Gardeners: Easy Choices That Deliver Great Results
Choosing the right plants is one of the most important decisions you’ll make as a new gardener. Many beginners fail not because they lack gardening skills, but because they start with plants that require advanced care or aren’t suited to their local growing conditions.
For your first season, focus on plants that are easy to grow, adaptable, and forgiving of small mistakes. These varieties germinate quickly, produce reliable harvests or blooms, and help you build confidence while learning essential gardening skills.
Expert Insight: Most horticulture experts recommend growing a few dependable plants well instead of trying to manage dozens of different varieties. A successful first season is about building experience, not growing everything at once.
Best Vegetables for Beginners
Vegetables that grow quickly and require minimal maintenance are ideal for first-time gardeners.
| Vegetable | Difficulty | Harvest Time | Growing Tips |
| Lettuce | Easy | 30–45 Days | Prefers cool weather and regular watering. |
| Radishes | Easy | 25–35 Days | One of the fastest-growing vegetables for beginners. |
| Bush Beans | Easy | 50–60 Days | Productive and don’t require support. |
| Cherry Tomatoes | Easy | 60–80 Days | Need full sun and a tomato cage or stake. |
| Cucumbers | Easy | 50–70 Days | Grow best with plenty of sunlight and consistent watering. |
| Zucchini | ⭐⭐ Easy | 45–60 Days | Highly productive—one or two plants are usually enough. |
Pro Tip: If you’re limited on space, choose compact or dwarf vegetable varieties. They perform well in containers and are easier to manage than full-size plants.
Best Herbs for Beginners
Herbs are among the easiest plants to grow and are perfect for patios, balconies, and kitchen gardens.
| Herb | Difficulty | Best Growing Method |
| Basil | Easy | Containers or garden beds |
| Parsley | Easy | Partial sun or full sun |
| Chives | Easy | Pots or borders |
| Thyme | Easy | Well-drained soil |
| Rosemary | Moderate | Full sun with good drainage |
| Mint* | Easy | Grow only in containers |
Common Mistake: Never plant mint directly in your garden unless you want it to spread aggressively. Keeping it in a container makes it much easier to control.
Best Flowers for Beginners
Flowers add beauty to your garden while attracting pollinators such as bees and butterflies.
| Flower | Difficulty | Why Beginners Love It |
| Marigolds | Easy | Low maintenance and naturally attract beneficial insects. |
| Zinnias | Easy | Bloom continuously throughout summer. |
| Sunflowers | Easy | Fast-growing and fun for families. |
| Petunias | Easy | Excellent for hanging baskets and containers. |
| Cosmos | Easy | Tolerate heat and attract pollinators. |
| Nasturtiums | Easy | Colorful edible flowers with very little maintenance. |
Best Fruits for Beginner Gardeners
If you’d like to grow fruit, start with varieties that are productive and relatively easy to maintain.
| Fruit | Difficulty | Best For |
| Strawberries | Easy | Containers, raised beds, and small gardens |
| Blueberries | Moderate | Acidic soil and sunny locations |
| Raspberries | Moderate | Backyard gardens with support structures |
| Dwarf Lemon Trees | Moderate | Containers in warm climates |
| Figs | Moderate | Warm regions with well-drained soil |
Dwarf fruit varieties are an excellent choice for beginners because they’re easier to prune, harvest, and protect during winter.
Match Plants to Your Growing Space
The best garden isn’t the one with the most plants—it’s the one where every plant has the right environment to thrive.
| Growing Space | Best Plants |
| Balcony | Herbs, lettuce, cherry tomatoes, peppers |
| Patio | Containers with vegetables, flowers, and herbs |
| Raised Beds | Tomatoes, beans, cucumbers, carrots, flowers |
| Backyard | Vegetables, fruit bushes, flowering plants |
| Indoor | Herbs, pothos, snake plants, peace lilies |
Choosing plants that suit your available space makes maintenance easier and improves your chances of success.
Plants Beginners Should Avoid (At First)
Some plants require precise watering, specific temperatures, or regular pest management. It’s best to save these for later, once you’ve gained more gardening experience.
Consider avoiding these during your first season:
- Cauliflower
- Celery
- Artichokes
- Watermelon
- Pumpkins (small gardens)
- Lavender in heavy clay soil
These plants aren’t impossible to grow, but they demand more attention than most beginner-friendly options.
Seasonal Gardening Tips: What to Do in Every Season
Gardening is a year-round journey, not just a spring activity. Each season brings different opportunities and challenges, from preparing the soil in spring to protecting plants during winter. Understanding what your garden needs throughout the year helps plants stay healthier, improves harvests, and reduces unnecessary work.
Instead of following the same routine every month, successful gardeners adjust their tasks according to the changing seasons.
One of the biggest differences between beginner and experienced gardeners is timing. Experienced gardeners know when to plant, prune, water, and harvest rather than doing everything at once.
Spring: Build a Strong Foundation
Spring is the busiest and most exciting gardening season. As temperatures begin to rise, it’s time to prepare your garden for healthy growth.
Spring Gardening Checklist
- Remove weeds, dead leaves, and winter debris.
- Add compost to improve soil fertility.
- Test soil drainage before planting.
- Plant cool-season vegetables like lettuce, spinach, peas, and carrots.
- Divide and replant overcrowded perennials.
- Check irrigation systems and garden tools.
Pro Tip: Don’t rush to plant warm-season vegetables too early. Wait until the danger of frost has passed and the soil has warmed sufficiently.
Summer: Focus on Plant Care
Summer is when plants grow rapidly, but it’s also when heat, drought, and pests become more common.
Summer Gardening Checklist
- Water deeply in the early morning.
- Apply mulch to conserve moisture.
- Harvest vegetables regularly to encourage continued production.
- Remove weeds before they spread.
- Monitor plants for pests and diseases.
- Support heavy plants like tomatoes with stakes or cages.
Common Mistake: Watering lightly every day encourages shallow roots. Deep watering once or twice a week (depending on weather and soil) helps plants develop stronger root systems.
Fall: Prepare for the Next Growing Season
Many people think gardening ends after summer, but fall is one of the best times to improve your garden.
Cooler temperatures reduce plant stress, making it an ideal season for soil improvement and planting certain crops.
Fall Gardening Checklist
- Harvest remaining vegetables before the first frost.
- Remove diseased plants and garden debris.
- Add compost or aged manure to planting beds.
- Plant garlic, onions, or cool-season greens where appropriate.
- Collect fallen leaves to make compost or mulch.
- Divide mature perennials if needed.
Healthy soil built in fall will be ready for planting when spring arrives, giving your garden a head start.
Winter: Plan, Protect, and Prepare
Even if your garden appears dormant, winter is an excellent time to prepare for the next season.
Winter Gardening Checklist
- Protect sensitive plants from freezing temperatures.
- Clean, sharpen, and oil gardening tools.
- Organize seeds and gardening supplies.
- Plan next year’s garden layout.
- Order seeds before popular varieties sell out.
- Continue turning your compost pile if weather allows.
Expert Tip: Keep a simple gardening journal throughout the year. Record what grew well, what struggled, and any pest or weather issues. These notes will help you make better decisions next season.
Seasonal Planting Guide
| Season | Best Activities | Recommended Plants |
| Spring | Prepare soil, sow seeds, transplant seedlings | Lettuce, spinach, peas, carrots, herbs |
| Summer | Water, mulch, fertilize, harvest | Tomatoes, cucumbers, peppers, beans, zucchini |
| Fall | Improve soil, plant cool-season crops | Garlic, onions, kale, broccoli, spinach |
| Winter | Plan next season, maintain tools, protect plants | Indoor herbs, microgreens, houseplants |
Weather Tips Every Beginner Should Know
Weather can change quickly, so it’s important to adapt your gardening routine instead of following a fixed schedule.
During Hot Weather
- Water early in the morning.
- Check soil moisture more frequently.
- Increase mulch if the soil dries quickly.
- Harvest vegetables regularly to reduce plant stress.
During Heavy Rain
- Skip watering until the soil begins to dry.
- Check for standing water around plant roots.
- Watch for fungal diseases caused by excess moisture.
During Frost Warnings
- Cover tender plants with frost cloths or lightweight fabric overnight.
- Move container plants indoors or to a sheltered area.
- Water the soil before a light frost, as moist soil retains heat better than dry soil.
Frequently Asked Questions About Gardening for Beginners
If you’re new to gardening, it’s natural to have questions. Below are answers to some of the most common beginner gardening questions, based on practical experience and expert recommendations.
What Is the Best Garden for a Beginner?
The best beginner garden is one that’s small, simple, and easy to maintain.
Instead of planting a large backyard garden, start with:
- A few containers on a patio or balcony
- One raised garden bed
- A small 4×4-foot vegetable plot
This allows you to learn essential gardening skills without becoming overwhelmed.
Growing a few healthy plants is far more rewarding than struggling to maintain dozens of different crops.
What Are the Easiest Vegetables to Grow?
Some vegetables are naturally more forgiving than others, making them ideal for first-time gardeners.
Beginner-Friendly Vegetables
- Lettuce
- Radishes
- Bush Beans
- Cherry Tomatoes
- Cucumbers
- Zucchini
These crops grow quickly, require basic care, and produce reliable harvests in most home gardens.
How Often Should I Water My Garden?
There’s no universal watering schedule because weather, soil type, and plant variety all affect how quickly the soil dries.
Instead of watering every day:
- Check the top inch of soil.
- Water only when it feels dry.
- Water deeply instead of lightly.
- Water early in the morning whenever possible.
This encourages stronger roots and healthier plants.
Do I Need Fertilizer Right Away?
Not always.
If you’ve improved your soil with compost before planting, your plants may have enough nutrients to grow well during their early stages.
Only apply fertilizer if:
- Plant growth slows noticeably.
- Leaves become pale.
- Flowering or fruit production decreases.
Healthy soil should always come before fertilizer.
Can I Start Gardening Without a Backyard?
Absolutely.
Many vegetables, herbs, and flowers grow successfully in:
- Containers
- Raised beds
- Balconies
- Patios
- Window boxes
Plants like basil, lettuce, spinach, peppers, cherry tomatoes, and strawberries perform particularly well in containers when they receive enough sunlight.
What’s the Biggest Mistake New Gardeners Make?
The most common mistake isn’t choosing the wrong plant—it’s trying to do too much during the first season.
Successful gardeners usually:
- Start small.
- Improve the soil first.
- Choose beginner-friendly plants.
- Observe their garden regularly.
- Learn from each growing season.
Gardening is a skill that develops over time, and every season teaches something new.
Final Thoughts
Starting your first garden doesn’t require years of experience, expensive equipment, or a large outdoor space. What it does require is thoughtful planning, healthy soil, the right plants, and a willingness to learn along the way.
By following the steps in this guide planning before you plant, improving your soil, choosing beginner-friendly crops, watering wisely, and adapting your care throughout the seasons you’ll avoid many of the common mistakes that discourage new gardeners.
Remember, even experienced gardeners lose plants from time to time. Weather changes, pests appear, and every growing season brings new lessons. The key is to stay curious, observe your plants regularly, and make small improvements each year.
A thriving garden isn’t built overnight. It’s built one seed, one season, and one lesson at a time.
Whether your goal is harvesting fresh vegetables, growing colorful flowers, or creating a peaceful outdoor retreat, the journey starts with a single plant. Start small, stay consistent, and enjoy watching your confidence and your garden grow together.